Dazbo's GCP Skillsboost Challenge Lab Walkthroughs
My experience and walkthroughs with the GCP Skillsboost Challange Labs.
Cloud Dataproc Cluster Operations and Maintenance
See Challenge Lab
Page Contents
Overview
The Data Scientist team plans to port an existing predictive machine learning application to a Cloud Dataproc cluster. The application is written in Python and runs on Spark. The application takes a long time to run, even with sample data.
So the Data Scientists have established a benchmark by running a program in their data center. They have attempted to run the benchmark on a Cloud Dataproc cluster, but it is taking longer than they would like. Your job is to run the benchmark program on Cloud Dataproc and make adjustments to the cluster configuration to meet their requirements.
The benchmark application is a PySpark application that calculates the value of Pi. It’s input parameter is the number of iterations it performs. At the start of the lab, when the benchmark program is submitted with the input value of 20, the job completes in under 75 seconds. When it is submitted with the required input value of 220, the job takes about 2 minutes to run, which does not meet the requirement.
Our goal: for the benchmark program to complete in under 75 seconds, with an input value of 220.
Objectives
- Setup
- Create a bucket for the cluster
- Create a cluster
- Run the PySpark benchmark job
- Upgrade the master node configuration and re-run the job
- Increase the number of worker nodes and re-run the job
What’s Going On?
In this lab, we will deploy a Dataproc cluster with the required specification. We then use this cluster to execute an existing PySpark job, which the lab provides. We know that this job will not run fast enough to meet the requirements of the lab. So this lab then tests our ability to do some rudimentary activities to increase the performance of the Dataproc cluster. Specifically:
- We will increase the size of the Dataproc cluster master GCE instance.
- We will increase the number of worker nodes in the cluster.
After each change, we re-run the original job and see how fast it runs.
Note: you have to name your clusters, and job your job IDs exactly as specified in the lab. If you don’t, the lab can’t verify that you’ve completed these steps.
Approach
There are a few ways you could do this lab. Perhaps the simplest approach is to use the Google Cloud Console to provision the bucket, provision the cluster, run the job, and make all the changes to the cluster. I wanted to use the Cloud CLI as much as possible, so many of the steps I describe here will be done using gcloud in the Cloud Shell.
Steps
Setup
There is no setup required for this lab. Just start your Cloud Shell.
Create a bucket for the cluster
Here we will create a bucket that Dataproc will use for its input data, and for its temporary data. We’re told we need to name it after our project ID. Then we’re told to copy the PySpark application from an existing location to our bucket. This is easy enough…
# get our project ID
export PROJECT_ID=$(gcloud info --format='value(config.project)')

# create our bucket
gsutil mb gs://$PROJECT_ID

# copy the PySpark code from source bucket to our bucket
gsutil cp gs://cloud-training/preppde/benchmark.py gs://$PROJECT_ID
Create the Dataproc cluster
Here I just used the Cloud Console. You just need to open Dataproc in the Cloud Console, create a new cluster, and ensure you specify the required parameters. I.e.
- Region: us-east1
- Zone: us-east1-b
- Version: 2.0-debian10
- Manager node: n1-standard-2
- Worker nodes: 2 of n1-standard-2
- Customise cluster -> Cloud Storage Staging bucket: select the bucket you created above.
(Your specific requirements might be different.)
It takes a few minutes to provision the cluster. When it’s done, you can always take a look in VM Instances and you’ll see the three instances that make up the cluster.
Run the PySpark benchmark job
We’re told to run the job with an input parameter of 20. Here’s how you can do it with gcloud:
# Note how we can use --id to specify a job id
gcloud dataproc jobs submit pyspark --id mjtelco-test-1 \
  --cluster mjtelco \
  gs://$PROJECT_ID/benchmark.py \
  --region us-east1 \
  --max-failures-per-hour=1 \
  -- 20
Note that you have to give the job a specific job ID, as specified in the lab. If you don’t specify this explicitly, then Dataproc just generates a job ID for you. But you need to use the specified job ID to pass the lab step. Although it’s obvious now, it took me a little while to work out how to specify a job ID!!
Notes:
- We’re submitting a job of type
pyspark. - We’re specifying an explicit ID.
- We point the job to the py file in our bucket.
- We pass the job a single parameter:
20.
The job runs pretty quickly.
We’re then told to run the job again, but this time with an input parameter of 220. So we run the same command, but with a new job ID and the new parameter value:
gcloud dataproc jobs submit pyspark --id mjtelco-test-2 \
  --cluster mjtelco \
  gs://$PROJECT_ID/benchmark.py \
  --region us-east1 \
  --max-failures-per-hour=1 \
  -- 220
From the Dataproc Jobs page, you can see the job progress. You’ll see it takes much longer to run.

Upgrade the master node configuration and re-run the job
There are a couple of ways you can change the spec of the master node instance. You could destroy the cluster and recreate it. But my approach was:
- Stop the master instance, from the VM Instances page in the Console.
- Edit the instance, and change its machine type to the required type, e.g.
n1-standard-4. - Start the instance.
This can all be done in a couple of minutes.
Now let’s re-run the job. Note that we’re changing the job ID again:
gcloud dataproc jobs submit pyspark --id mjtelco-test-3 \
  --cluster mjtelco \
  gs://$PROJECT_ID/benchmark.py \
  --region us-east1 \
  --max-failures-per-hour=1 \
  -- 220
What you’ll probably find is that this has made very little difference to the overall job time.
Increase the number of worker nodes and re-run the job
Now we’ll increase the number of worker nodes from 2 to 5, giving us more parallel processing capability in the cluster.
gcloud dataproc clusters update mjtelco \
  --region us-east1 \
  --num-workers 5
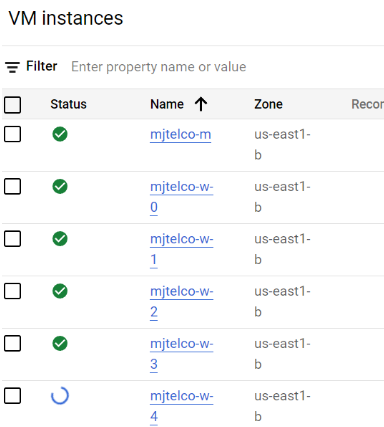
It takes a couple of minutes to add and start the extra worker nodes. You can monitor progress in the VM instances page:
Now, we can run our job one last time:
gcloud dataproc jobs submit pyspark --id mjtelco-test-4 \
  --cluster mjtelco \
  gs://$PROJECT_ID/benchmark.py \
  --region us-east1 \
  --max-failures-per-hour=1 \
  -- 220
And this time it runs in under 75 seconds. Woop!